Katana Slicer - Print Settings
Fuzzy Skin
The Fuzzy skin feature lets you create a rough fiber-like texture on the sides of your models. If enabled, the perimeter will be resampled with a random step size and each new sample point will be shifted inside or outside of the perimeter by a random length limited by the Fuzzy skin thickness. This simple algorithm produces surprisingly nice results suitable for tool handles or just to give the print surface a new interesting look or to hide print imprecisions. You can also use modifiers to apply fuzzy skin only to a portion of your model.
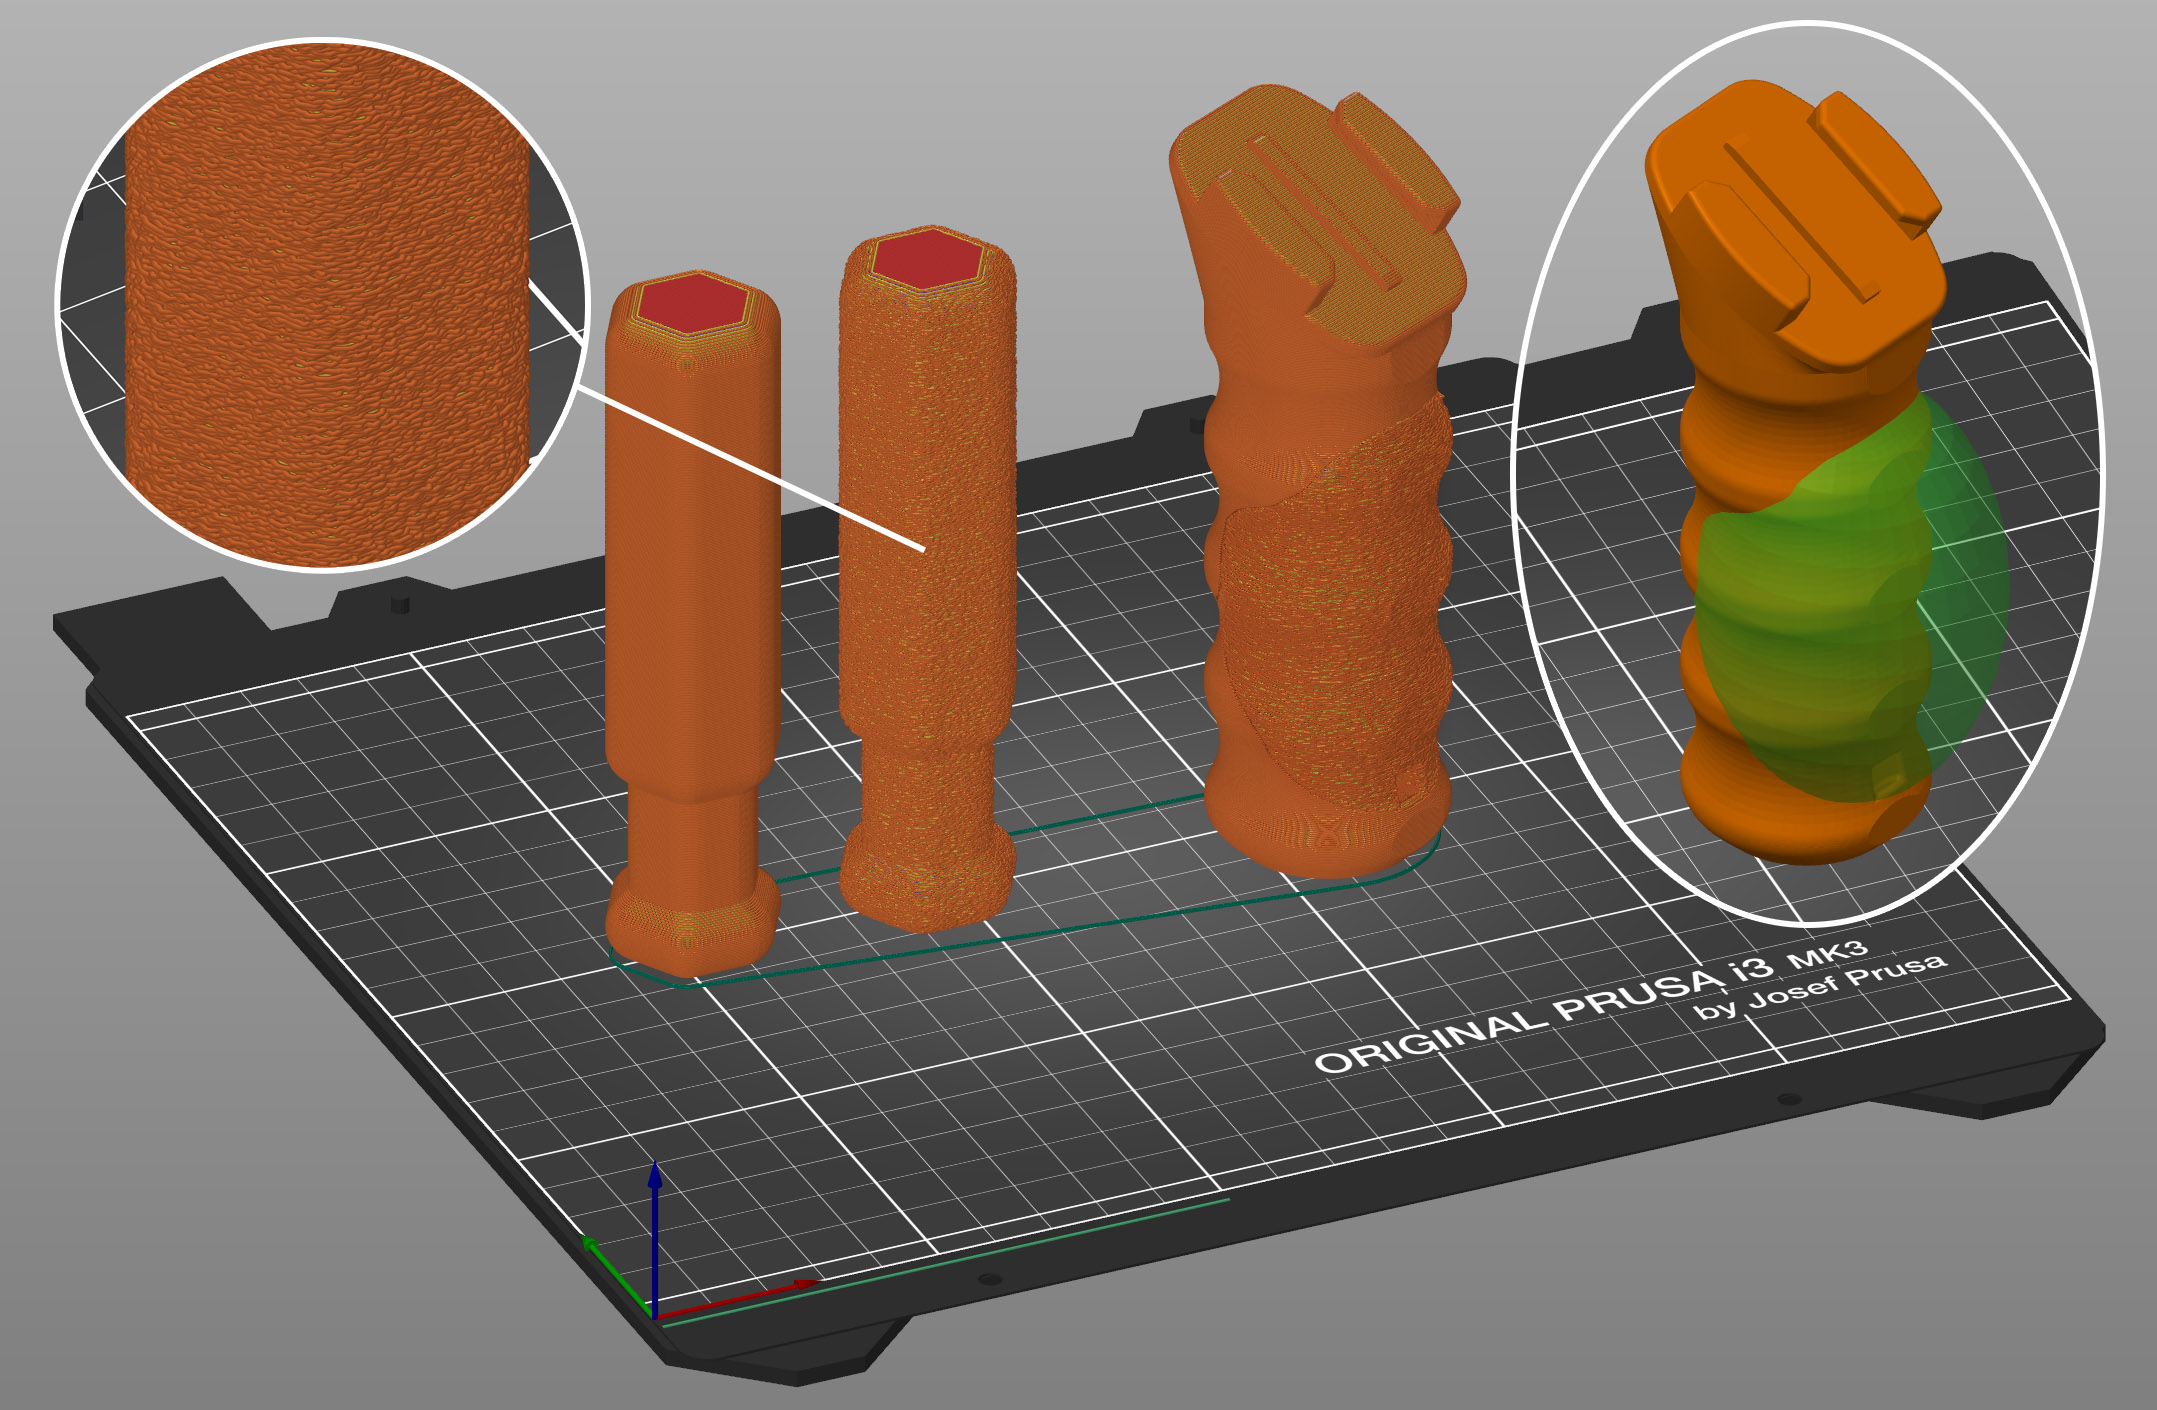
You’ll find Fuzzy skin settings in Print settings – Layers and perimeters.

Fuzzy skin type
You can select to apply Fuzzy skin only to External perimeters or to All perimeters.
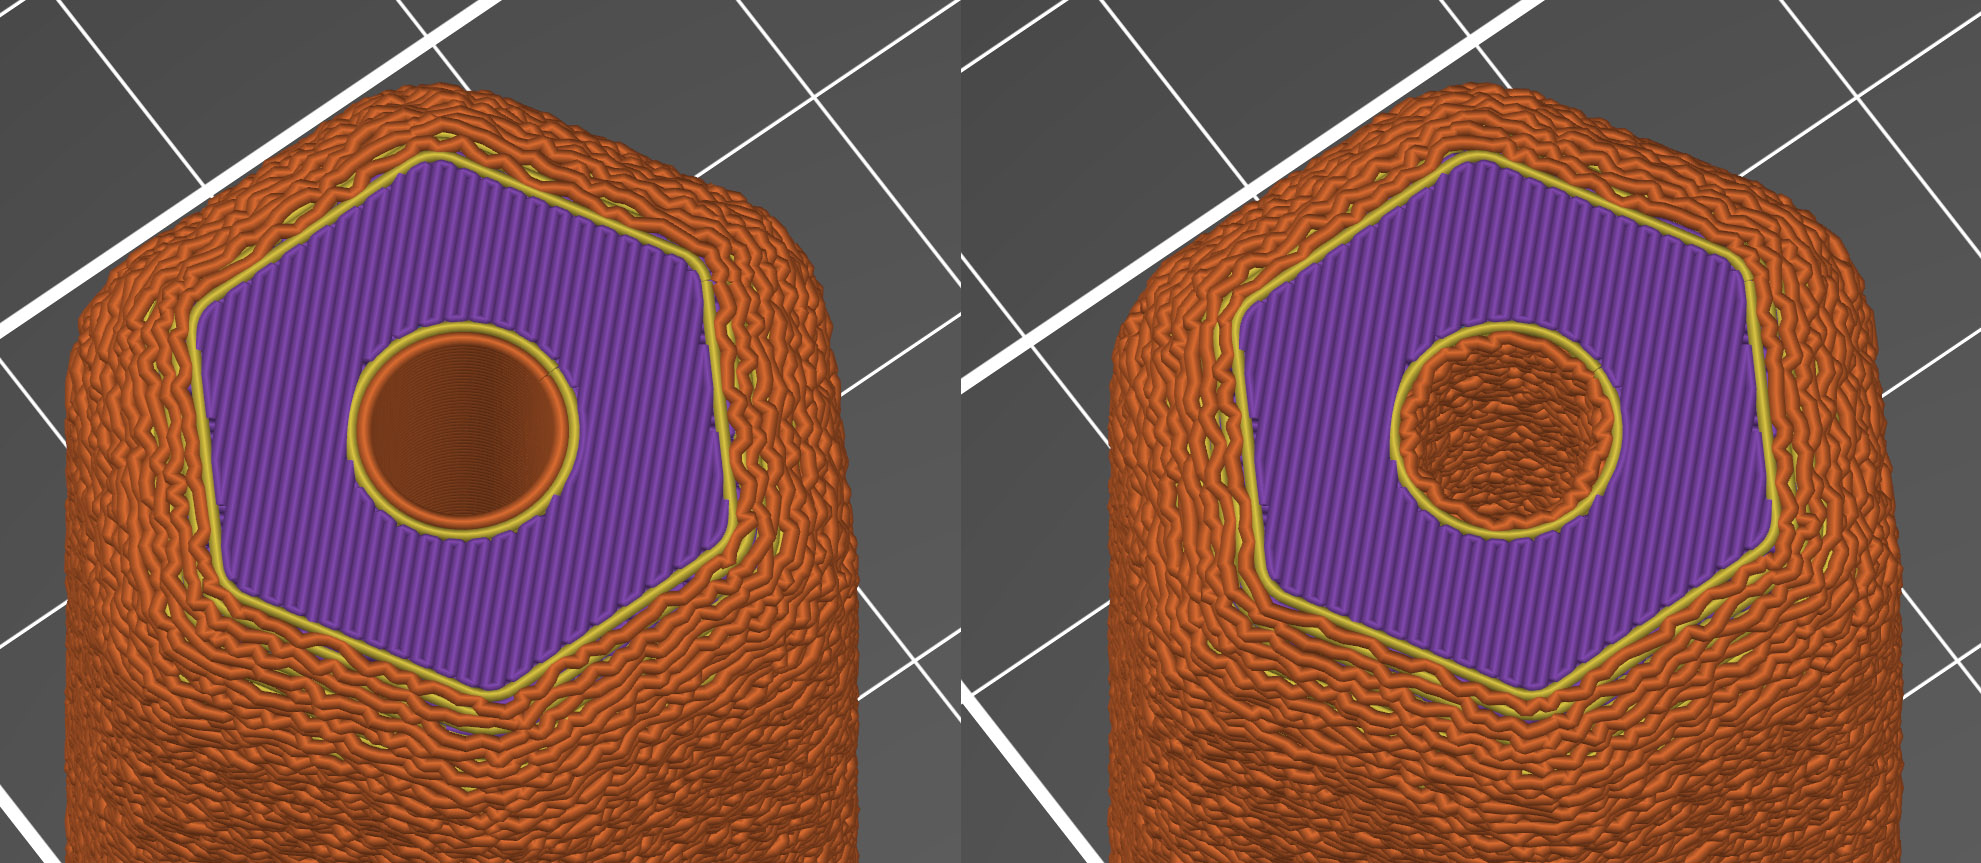
Fuzzy skin type set to External perimeters (left), All perimeters (right)
Fuzzy skin thickness
The maximum distance that each skin point can be offset (both ways) is measured perpendicular to the perimeter wall.
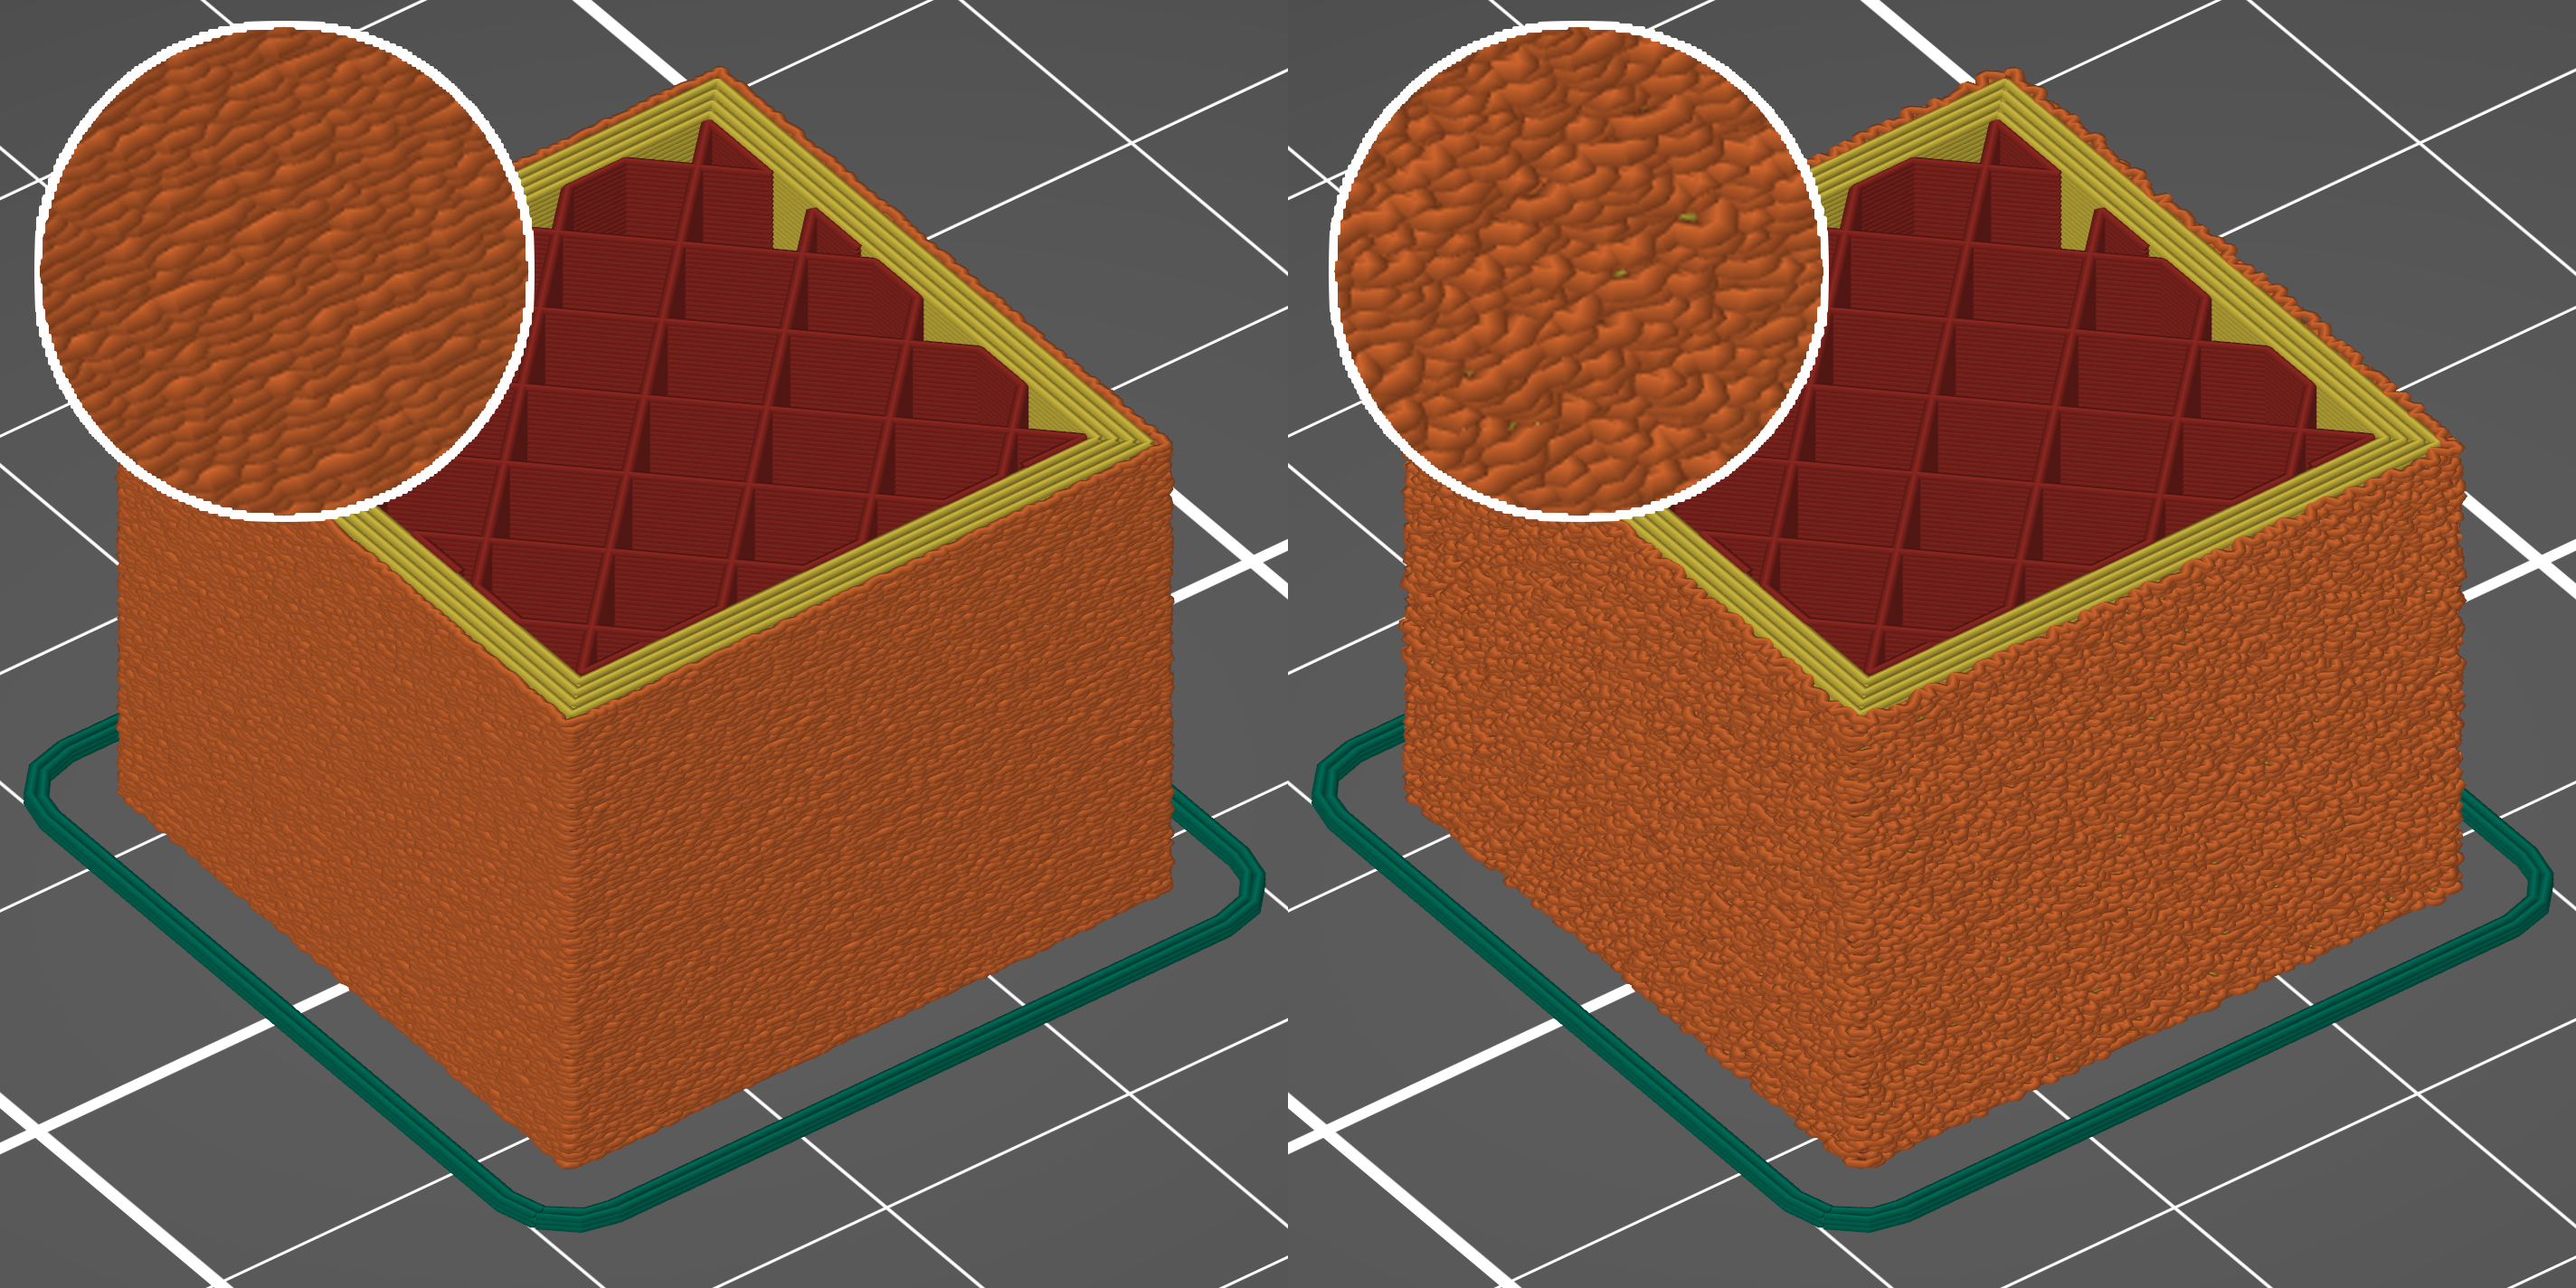
Fuzzy skin thickness 0.1 mm (left), 0.3 mm (right)
Fuzzy skin point distance
Perimeters will be split into multiple segments by inserting Fuzzy skin points. Lowering the Fuzzy skin point distance will increase the number of randomly offset points on the perimeter wall.
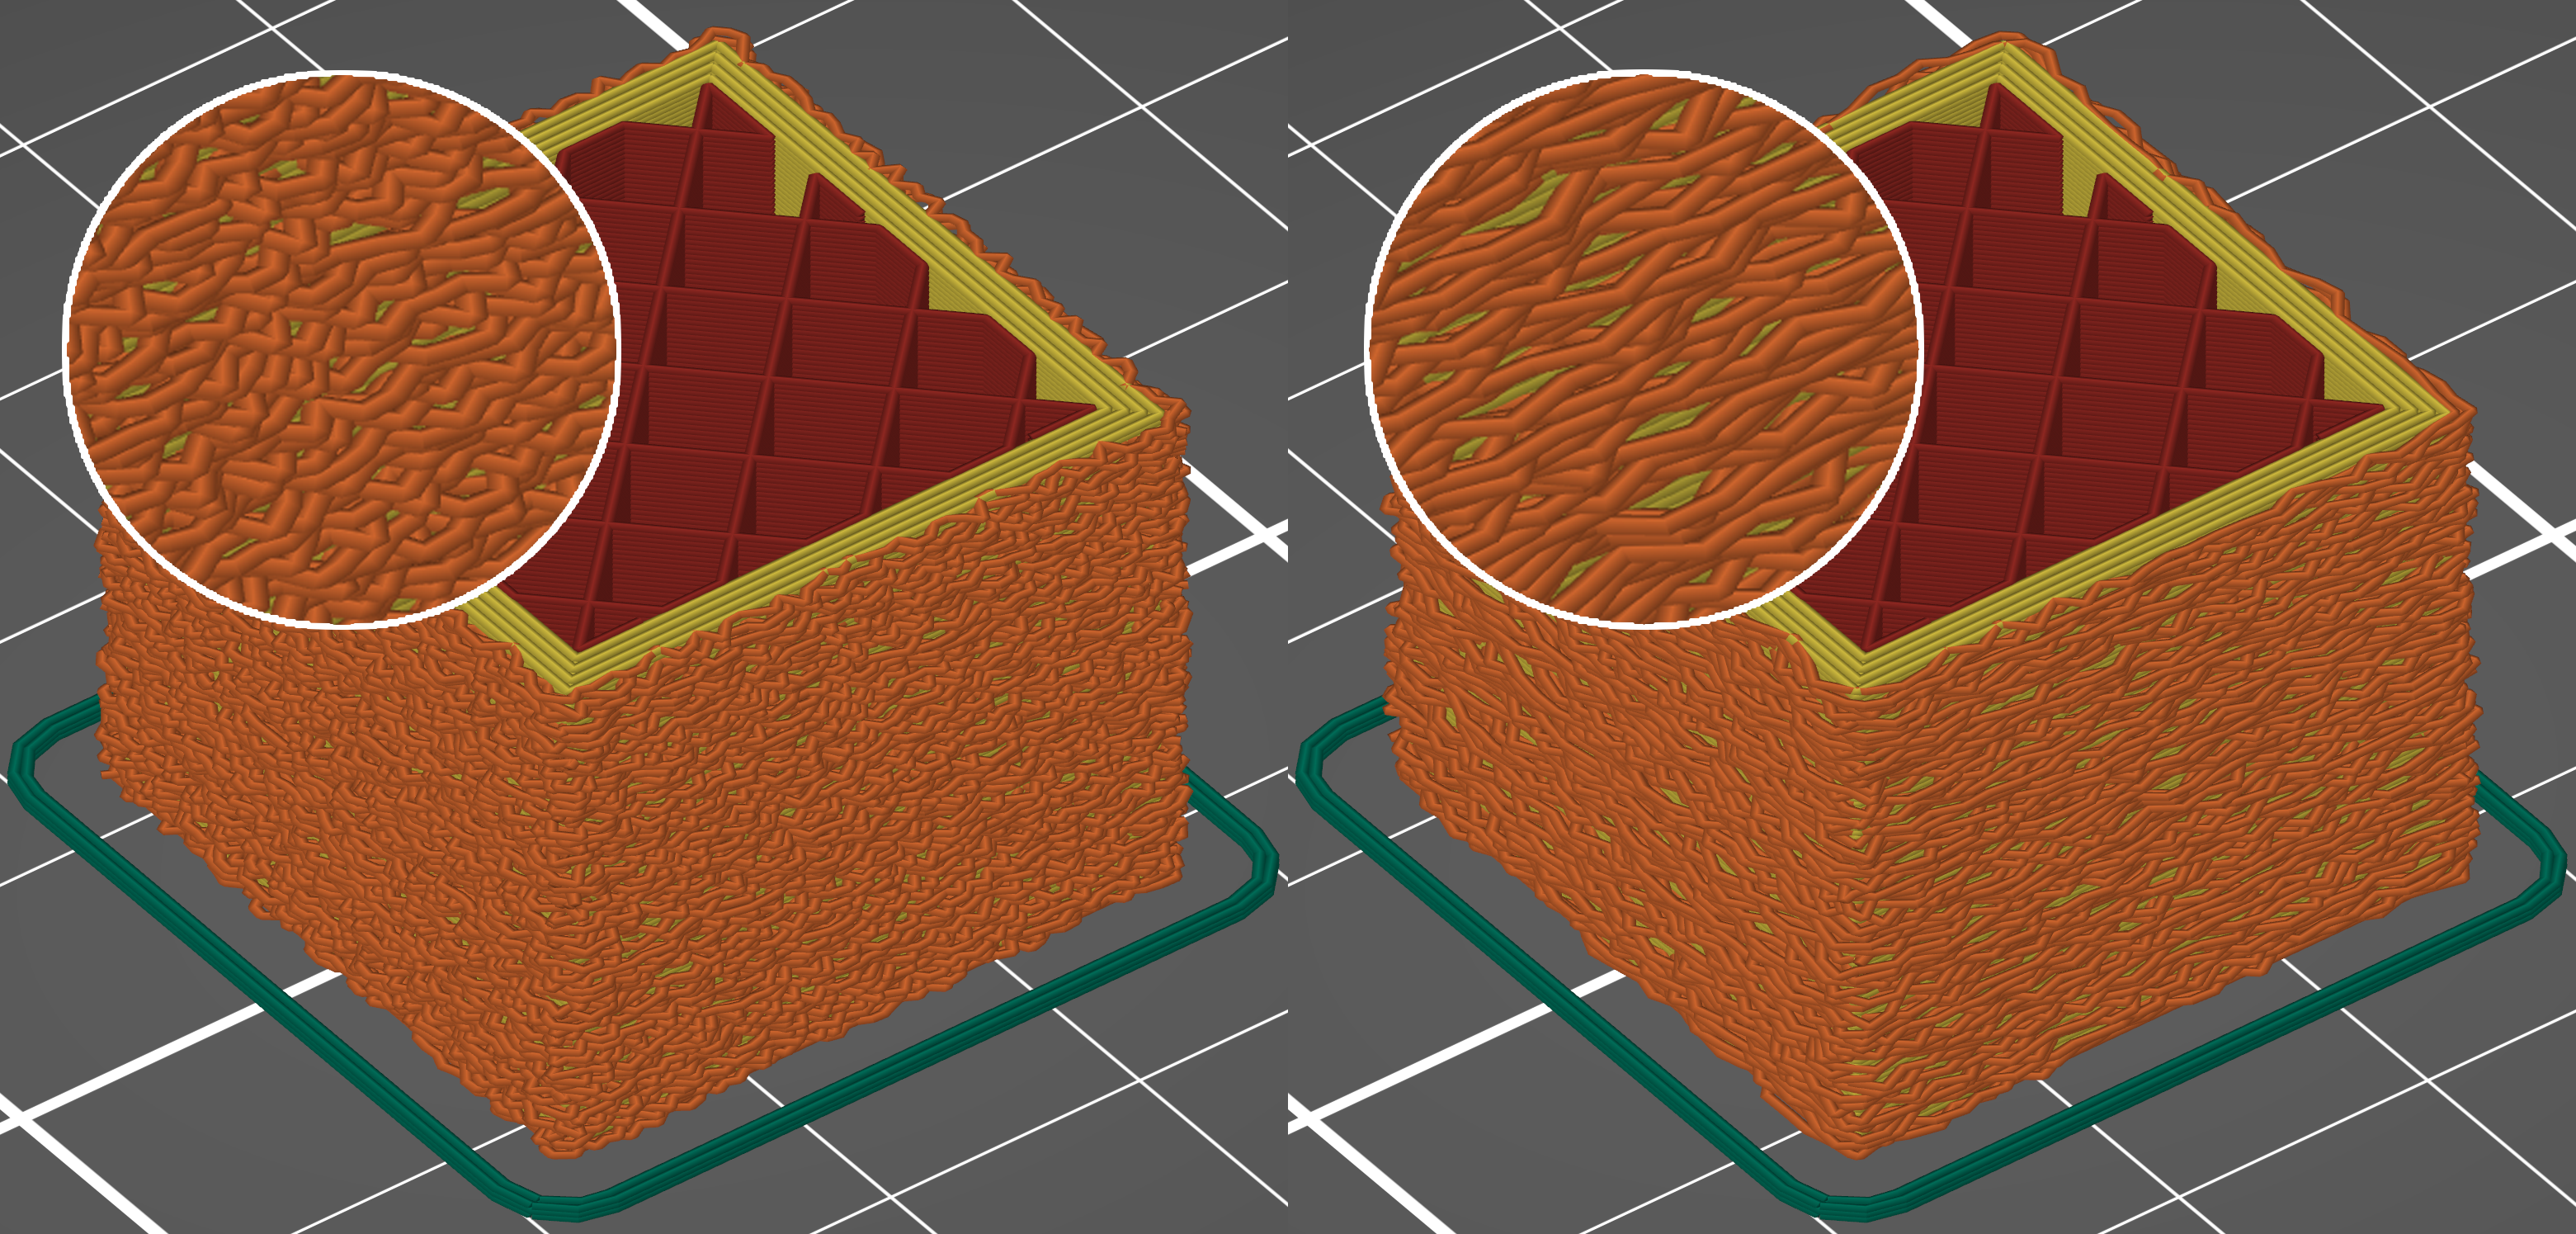
Fuzzy skin point distance 0.5 mm (left), 1.0 mm (right)
Fuzzy skin modifier
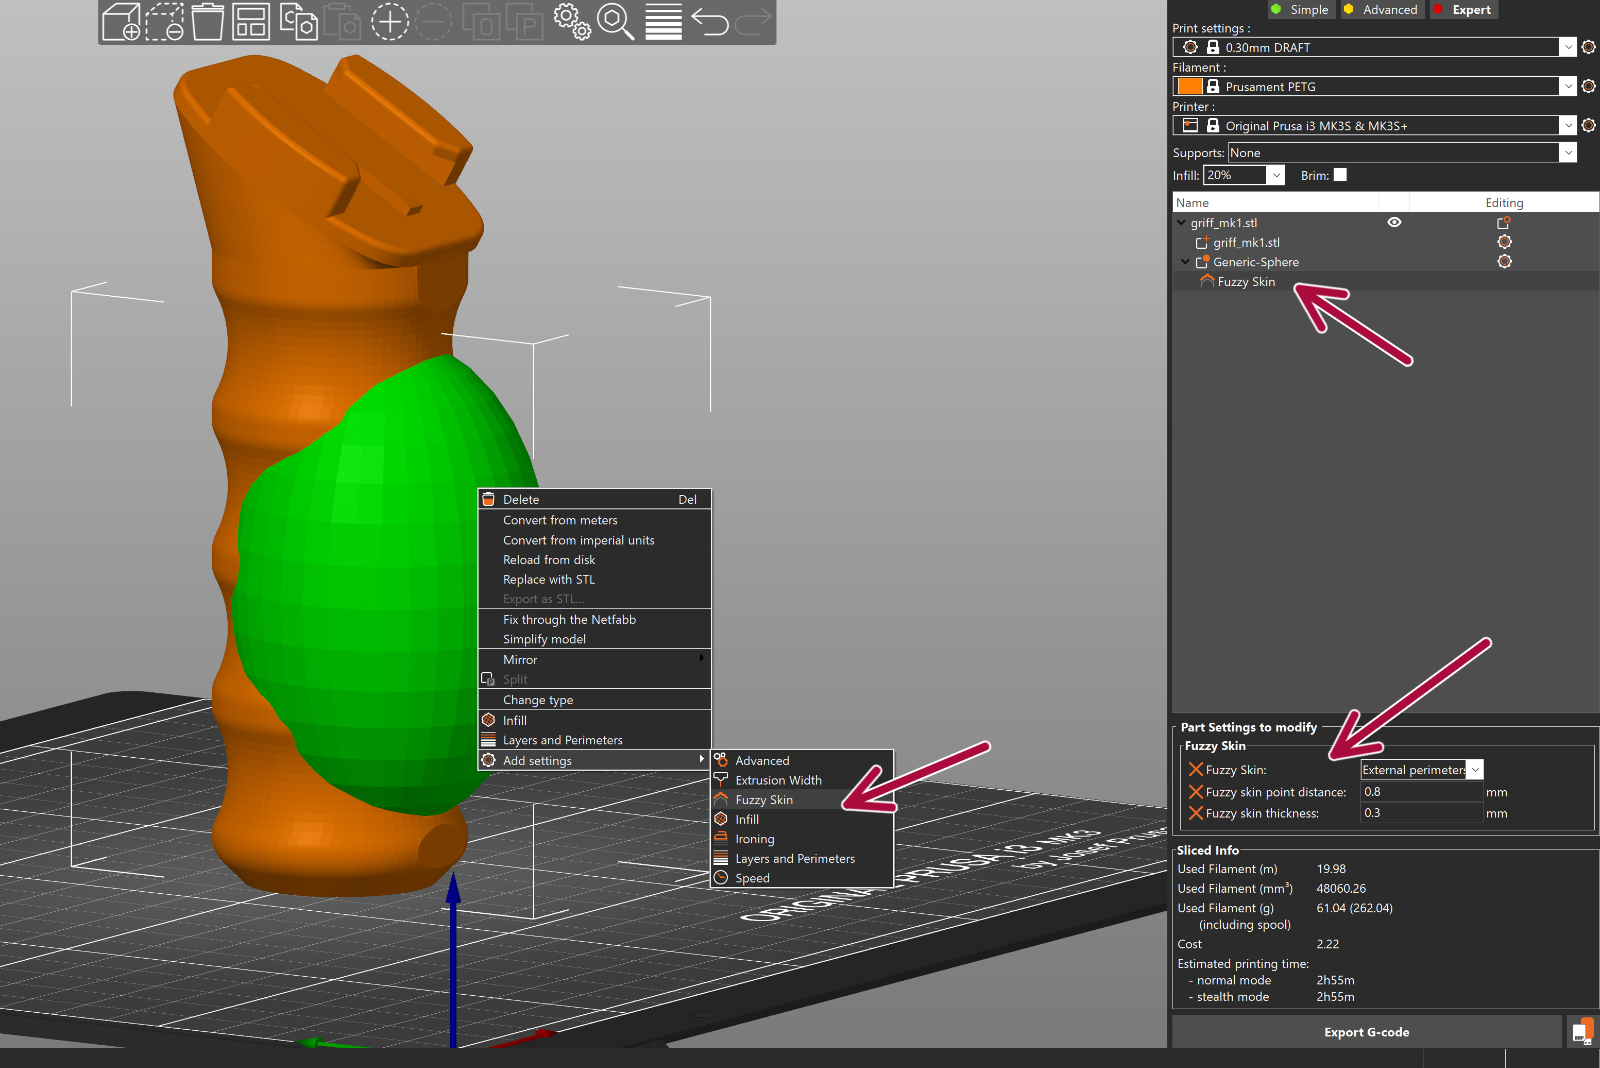
You can use modifiers to apply fuzzy skin only to a portion of your model.
- Right-click a model and pick Add modifier – [Select modifier type].
- Position the modifier so that it overlaps with your model
- Right-click the modifier and choose Add settings – Fuzzy Skin
- In the pop-up window, select which settings you wish to modify
- Change Fuzzy skin to External perimeters or All Perimeters
- Optionally, you can edit other Fuzzy Skin settings as well
*Thank you to Prusa3D for providing the content used in this post.
